Wednesday, May 27, 2009

Apple Strudel (DB)

This month's Daring Bakers Challenge is Apple Strudel, and I was definitely excited about this recipe, as I've never attempted making strudel. As a matter of fact, I don't think I've tasted homemade strudel... until now.
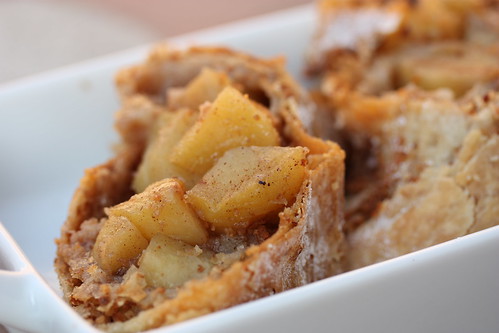
The ingredient list is pretty simple, but the challenge definitely comes in making and stretching the dough to create the impossibly thin and flaky layers. I definitely had my challenge in getting the dough paper thin, and didn't even come close to getting the dough stretched to the 2'x3' dimensions indicated in the recipe (mine fell a little short at 18"x 24"). Once the dough was prepped, I made a simplified version of the apple filling (no nuts, no raisins).

At the end of this baking exercise, my kitchen was an absolute disaster area, but the clean up was definitely worth the effort. Who knew how delicious homemade strudel could be! Thanks to Linda of Make Life Sweeter! and Courtney of Coco Cooks for selecting this challenging but delicious recipe.
APPLE STRUDEL
from “Kaffeehaus – Exquisite Desserts from the Classic Cafés of Vienna, Budapest and Prague” by Rick Rodgers

Apple Filling
2 tablespoons (30 ml) golden rum (omitted)
3 tablespoons (45 ml) raisins (omitted)
1/4 teaspoon ground cinnamon
1/3 cup plus 1 tablespoon (80 g) sugar
1/2 cup (1 stick / 115 g) unsalted butter, melted, divided
1 1/2 cups (350 ml) fresh bread crumbs
strudel dough (recipe below)
1/2 cup (120 ml, about 60 g) coarsely chopped walnuts (omitted)
2 pounds (900 g) tart cooking apples, peeled, cored and cut into ¼ inch-thick slices (use apples that hold their shape during baking)

1. Mix the rum and raisins in a bowl. Mix the cinnamon and sugar in another bowl.

2. Heat 3 tablespoons of the butter in a large skillet over medium-high. Add the breadcrumbs and cook whilst stirring until golden and toasted. This will take about 3 minutes. Let it cool completely.

3. Put the rack in the upper third of the oven and preheat the oven to 400°F (200°C). Line a large baking sheet with baking paper (parchment paper). Make the strudel dough as described below. Spread about 3 tablespoons of the remaining melted butter over the dough using your hands (a bristle brush could tear the dough, you could use a special feather pastry brush instead of your hands). Sprinkle the buttered dough with the bread crumbs. Spread the walnuts about 3 inches (8 cm) from the short edge of the dough in a 6-inch-(15cm)-wide strip. Mix the apples with the raisins (including the rum), and the cinnamon sugar. Spread the mixture over the walnuts.

4. Fold the short end of the dough onto the filling. Lift the tablecloth at the short end of the dough so that the strudel rolls onto itself. Transfer the strudel to the prepared baking sheet by lifting it. Curve it into a horseshoe to fit. Tuck the ends under the strudel. Brush the top with the remaining melted butter.

5. Bake the strudel for about 30 minutes or until it is deep golden brown. Cool for at least 30 minutes before slicing. Use a serrated knife and serve either warm or at room temperature. It is best on the day it is baked.

Strudel Dough
1 1/3 cups (200 g) unbleached flour
1/8 teaspoon salt
7 tablespoons (105 ml) water, plus more if needed
2 tablespoons (30 ml) vegetable oil, plus additional for coating the dough
1/2 teaspoon cider vinegar

1. Combine the flour and salt in a stand-mixer fitted with the paddle attachment. Mix the water, oil and vinegar in a measuring cup. Add the water/oil mixture to the flour with the mixer on low speed. You will get a soft dough. Make sure it is not too dry, add a little more water if necessary.
Take the dough out of the mixer. Change to the dough hook. Put the dough ball back in the mixer. Let the dough knead on medium until you get a soft dough ball with a somewhat rough surface.

2. Take the dough out of the mixer and continue kneading by hand on an unfloured work surface. Knead for about 2 minutes. Pick up the dough and throw it down hard onto your working surface occasionally.
Shape the dough into a ball and transfer it to a plate. Oil the top of the dough ball lightly. Cover the ball tightly with plastic wrap. Allow to stand for 30-90 minutes (longer is better).

3. It would be best if you have a work area that you can walk around on all sides like a 36 inch (90 cm) round table or a work surface of 23 x 38 inches (60 x 100 cm). Cover your working area with table cloth, dust it with flour and rub it into the fabric. Put your dough ball in the middle and roll it out as much as you can.
Pick the dough up by holding it by an edge. This way the weight of the dough and gravity can help stretching it as it hangs. Using the back of your hands to gently stretch and pull the dough. You can use your forearms to support it.

4. The dough will become too large to hold. Put it on your work surface. Leave the thicker edge of the dough to hang over the edge of the table. Place your hands underneath the dough and stretch and pull the dough thinner using the backs of your hands. Stretch and pull the dough until it's about 2 feet (60 cm) wide and 3 feet (90 cm) long, it will be tissue-thin by this time. Cut away the thick dough around the edges with scissors. The dough is now ready to be filled.
~~~~~~~~~~~~~~~~~~~~~~~~~~~~~~~~~~~~~~~~~~~~~~~~~~~~~~~~~~~~~~~~~~~~~~~~~~~~~~~~

The May Daring Bakers’ challenge was hosted by Linda of make life sweeter! and Courtney of Coco Cooks. They chose Apple Strudel from the recipe book Kaffeehaus: Exquisite Desserts from the Classic Cafés of Vienna, Budapest and Prague by Rick Rodgers.

Tuesday, May 26, 2009

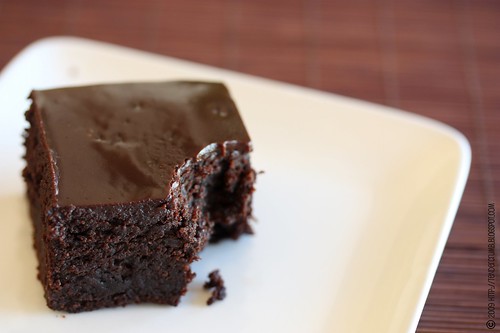
Chipster-Topped Brownies (TWD)

If you know me, I have a little "thing" for brownies. I'm game in trying all sorts of brownie concoctions, but I have only one requirement: keep the recipe simple --- no nuts, frostings, fillings, or other flavors to interfere with the chocolatey goodness.
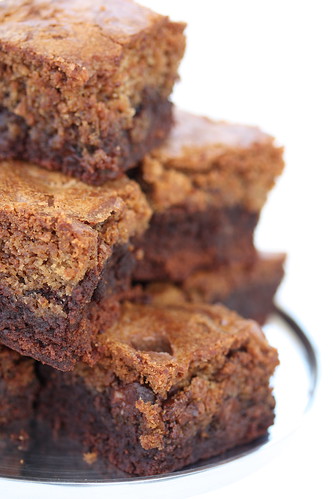
You can bet that I was skeptical about this week's Tuesdays With Dorie recipe for Chipster-Topped Brownies. A chocolate chip cookie layered on top of a brownie? Doesn't sound like my cup of tea. In fact, I was going to skip this week's recipe.

Fate would have it that I would try this recipe out. The Los Angeles Marathon was a big event in the city yesterday, and part of the race goes right through my neighborhood (I live in Miracle Mile, between mile 16 and 17). With all of the road closures, I was landlocked for a good chunk of the morning. Aside from cheering on some AMAZING athletes (I can't even imagine running 26.2 miles in a little over 2 hours), I had a bit of free time on my hands. So, with all of the ingredients available in my kitchen, I decided to take this recipe for a spin.

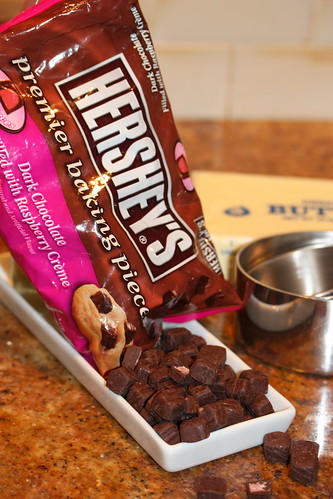
You can find the complete recipe over at Supplicious. My only adjustments were omitting the nuts in the brownie layer, and substituting the chocolate chips in the cookie layer with this:
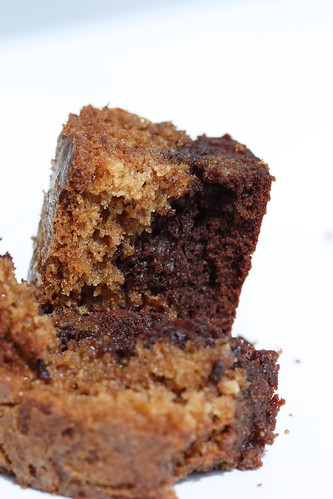
This recipe is definitely not for the faint of heart, as it uses 3 1/2 sticks of butter (yes, this is not a typo). After baking for 65 minutes (slightly longer than the 50-55 minutes as stated in the book), I was amazed at how thick this brownie would turn out. After cutting, I realized that the raspberry chips sunk into the brownie layer, thus you don't see these chips studding the cookie layer.

More importantly, how does this brownie taste? Oh my goodness, what an unexpected and delicious surprise!!! The brownie layer was wonderfully cakey (I'm one of the rare few that enjoy cakey brownies) with a fantastic bittersweet chocolate flavor. The cookie layer provided a crispy/chewy contrast, and the raspberry chips delivered an unexpectedly delicious flavor punch. It's definitely rich, so a small piece will satisfy a sweet tooth. Besides, a small piece probably contains two tbsp of butter - yikes!
Thank you Beth for a fantastic selection this week! Make sure to visit the TWD Blogroll to see how the other fantastic bakers fared with this recipe. Before I go, wanted to share the latest picture of Siena giving a little love to her new toy:

Sunday, May 24, 2009

Mile High Devil's Food Cake (TCS)

I'm a little late to The Cake Slice party! Better late then never, as I didn't want to miss out on opportunity to make another scrumptious cake recipe from Sky High: Irresistable Triple-Layer Cakes. This month's recipe is a Mile-High Devil's Food Cake, with a choice of Brown Sugar Buttercream or Brown Sugar Seven-Minute Frosting (for a lighter frosting alternative).

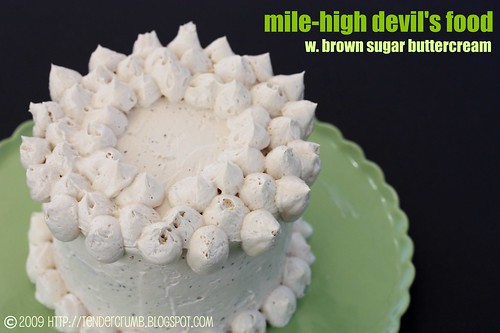
I made the full recipe, with the majority being made into 2 1/2 dozen cupcakes for a work colleague's baby shower. I did reserve enough cake batter and frosting to make a 4 inch mini-cake (what a surprise), which is shown here.
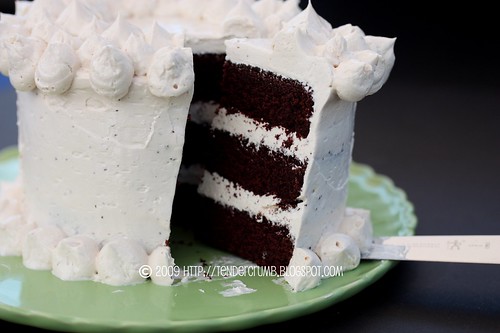
The cake is really easy to make and calls for cocoa powder to deliver its wonderful chocolate flavor. The cake has a beautiful, tight crumb and is wonderfully moist.I opted for the buttercream recipe --- sure, it calls for a pound of butter, but it is totally worth the caloric investment. In this recipe, white sugar is swapped for brown sugar, which provides a subtle caramel flavor and gives the buttercream a beautiful ivory color. It was an delicious complement to the chocolate cake, and I thought the color contrast was really beautiful.
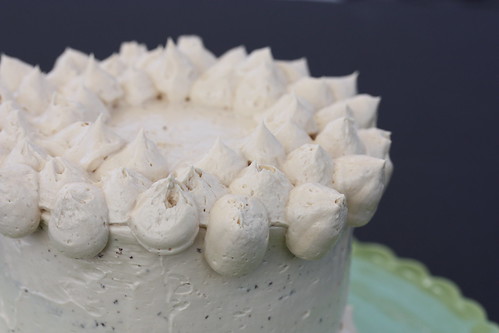
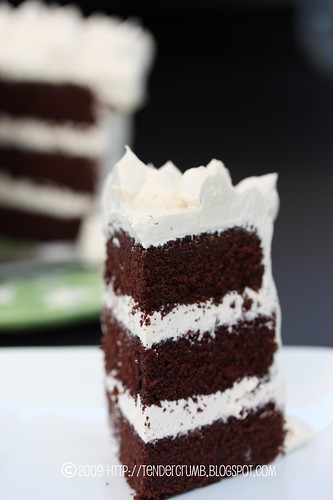
I was being a bit lazy, and didn't do a crumb coat, thus ending up with specks of cake thoughout the frosting (argh). Oh well---this little treat was for my hubs and me, and we enjoyed every bit of this cake, specks and all!

Mile-High Devil’s Food Cake
From: Sky High: Irresistible Triple-Layer Cakes by Alisa Huntsman and Peter Wynne
Makes an 8-inch triple layer cake

Devil's Food Cake

1 cup of unsweetened cocoa NOT DUTCHED PROCESSED
1 and ¼ cups of hot water
3 cups of light brown sugar; packed
2 and 2/3 cups cake flour*
1 and ½ teaspoons baking soda
¾ teaspoon of salt
9 ounces of unsalted butter at room temperature [2 sticks plus 2 tablespoons]
3 large eggs
1 ½ teaspoons of vanilla extract
¾ cup of cold water
{*1 cup of cake flour is equal to ¾ cup of flour plus 2 tablespoons of cornstarch}

Preheat the oven to 325 degrees F.

Butter the bottoms and sides of three 8-inch round cake pans. Line the bottoms of the pans with parchment paper and grease the paper as well.

Place the cocoa in a medium bowl and add the hot water. Whisk until smooth and let it cool to room temperature.

In the bowl of an electric mixer, combine the sugar, flour, baking soda, and salt. With the mixer on low blend to combine. Add the butter and the dissolved cocoa. Then raise the mixer to medium speed and beat for 2 minutes until light and fluffy.

In a medium bowl whisk together the eggs, vanilla, and cold water until combined. Add this liquid to the batter in three additions scraping down the sides of the bowl between additions. Divide the batter among the three pans.

Bake for 35-45 minutes or until a cakes tester inserted into the almost comes out clean. There should be a few crumbs attached still. Cool the cakes in the pans for 15 minutes. Then invert and remove parchment paper and cool completely on a wire rack.

{Bakers’ choice of: Brown Sugar 7-Minute Frosting or Brown Sugar Buttercream}

Brown Sugar 7-Minute Frosting

6 egg whites
1 and ½ cups of brown sugar
¼ cup light corn syrup*
2 tablespoons of water
½ teaspoon of cream of tartar
{*corn syrup can be substituted with equal parts of treacle OR liquid glucose OR light colored honey}

Do not try to make this frosting on a rainy day or if you live in an extremely humid area. The humidity will make it impossible to work with the egg whites.

Place all the egg whites in a bowl and set them aside while you make the syrup.

In a small heavy saucepan, combine the brown sugar, corn syrup, and water. Bring to a boil over medium-low heat, stirring to dissolve the sugar. Continue to boil washing down the sides of the pan with a wet pastry brush. Boil until the syrup reaches 238 degrees F (softball stage) on a candy thermometer. Immediately remove from heat.

Add the cream of tartar to the egg whites in the bowl and beat just to combine. With the mixer on medium speed gradually add the syrup in a thin stream taking care not to hit the beaters. Beat until fairly stiff peaks form but the frosting is still spreadable. If the frosting is too stiff it will be hard to work with. Use immediately.

Brown Sugar Buttercream

5 egg whites
1 and ¼ cups of packed brown sugar
¼ cup of water
1 pound of unsalted butter (16 ounces) at room temperature

Place all the egg whites in the bowl of an electric mixer; set aside.

In a heavy medium saucepan combine the sugar and water. Cook over medium heat stirring to dissolve the sugar. Then bring to a boil without stirring and cook until the syrup reaches 238 degrees F on a candy thermometer.

Begin beating the egg whites on medium low speed. Slowly pour in the syrup making sure not to hit the beater. Increase the mixer speed to medium high and beat until the meringue has cooled to body temperature.

With the mixer on med-low add 1-2 tablespoons of butter at a time. When all the butter has been added increase the mixer’s speed to medium and beat until the mixture looks curdled or separated. Continue to beat until the icing comes together again looking like soft smooth whipped butter.

Assembling the cake:
Place one layer flat side down and cover it with 2/3 cup of the frosting. Top with second layer and repeat process. Top with third layer and frost the sides of the cake.

Bakers Notes:
A cake topped with the meringue frosting is the best the day it’s made. It does not do well in the fridge.

If you choose the buttercream frosting you can keep it in the fridge for 3 days. Make sure to allow the cake to come to room temperature for 1 to 1 ½ hours. Otherwise the frosting will be hard and heavy.

Thursday, May 21, 2009

A New Houseguest...

You'll have to forgive my flakiness with my baking and blogging this past week. I've been a little distracted in giving my undivided attention to the newest member of our family:
We've been eagerly waiting for Siena to come home with us since the beginning of this year, and I can't believe she's finally here. We love her tons!
Things have been hectic with a new puppy in the house, so I haven't had a lot of time to bake or blog (or sleep for that matter). With the long weekend coming up, I should be back in the kitchen soon....

Tuesday, May 19, 2009

Fresh Mango Bread (TWD)

Help, my hard drive was attacked by computer gremlins! For the life of me, I can't seem to locate my mango bread photos. Sorry, this lone photo is all I have to share. I'm bummed! :(

Mango Bread is this week's Tuesdays With Dorie recipe. Aside from eating mangos fresh or sipping a mango-rita (man, I could use one of those right now), I've never baked with this fruit. I was very interested to see how this would turn out.

I followed this quick bread recipe as written, and my only addition was topping the loaf with a lime glaze that was made with 2 tbsp lime juice (using the zested lime) and 1 C. powdered sugar.

The texture of the loaf was nice and moist, and I enjoyed the chunks of diced fruit. Even after giving the loaf a couple of days to let the flavors mature, I was a little underwhelmed with the flavor of the bread, . I was anticipating great fruit flavor from the mango and lime, but it was much more subtle than I expected.

Such a bummer...I had high hopes for this recipe. Then again, it could just be me. The hubs took the loaf to work, and he shared that it was happliy gobbled up by his co-workers.

Thanks Kelly of Baking with the Boys for this week's selection. Please visit Kelly's blog for the full recipe.

I'm curious to see how the other TWD bakers fared with this recipe. If you're curious like I am, make sure to visit the TWD blogroll.

Tuesday, May 12, 2009

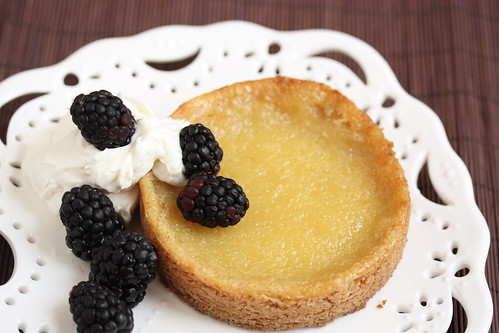
Tartest Meyer Lemon Tart (TWD)

After the overload of rich chocolate recipes last month, this week's TWD recipe for Tartest Lemon Tart was a refreshing change of pace. I love all things that are intensely sweet & tart (I'm a total Sour Patch Kid junkie), and I was totally looking forward to making this. What is so unique and intruiging about this recipe is the use of whole lemons, peel and all.

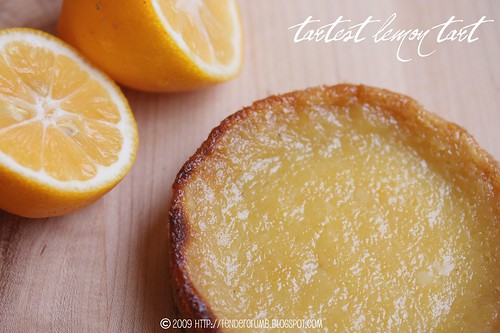
I couldn't resist making individual tartlettes. Here are my notes and adjustments (for the full recipe please visit Babette Feasts):

- made a full recipe of shortbread nut crust, using Trader Joe's Almond Meal, and I yielded four 4" tartlettes and four 3" tartlettes.

- I made a half recipe of the lemon filling and used 1 whole meyer lemon (it's the end of their season ---*sigh*). This yielded the perfect amount of filling for the four 4" tartlettes.

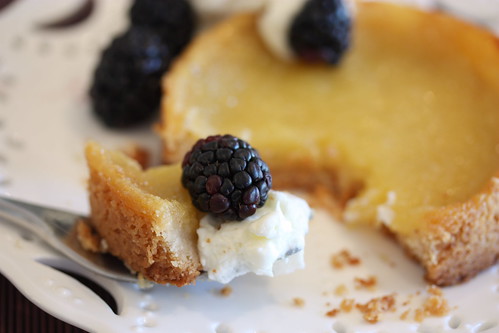
I loved how the filling slightly overflowed and formed a brown slightly crispy/chewy crust around the edge. For me, that was the tastiest part of this tart. :)


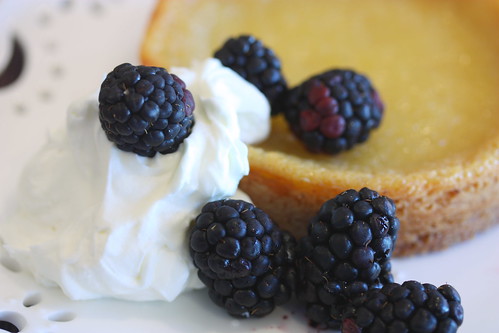
Creme fraiche would have been a perfect partner to this tart. As I didn't have any handy, I whipped up a mixture of heavy cream, sour cream and powdered sugar, and it worked wonderfully. A handful of tart blackberries completed this beauty of a dessert. So, was this tart ...too tart? Absolutely not! As I used meyer lemons, the tartness was probably downplayed. Still, this tart delivered a wonderfully fresh and bright lemon flavor with just the right amount of sweetness to prevent your mouth from puckering. The buttery, crunchy crust played perfectly with the jammy filling.
Feeling a little adventurous, I eyed a 1/2 pink grapefruit sitting on the counter that was leftover from breakfast .... hmmm...how about a grapefruit tart? I used this half and made a half batch of the filling, which was way more than enough for the three remaining tart shells. Eyeballing what I had left, the half batch would have yielded enough filling for eight 3" tartlettes. The tarts baked beautifully with a gorgeous orange/pink hue, but the taste was a whole different story...way too bitter! I should have removed the pith. Oh well, you live and learn. I still love this idea of a grapefruit tart, so I'm doing to attempt this again soon, sans the white pith. Stay tuned and I'll tell you how it turns out in a future post.
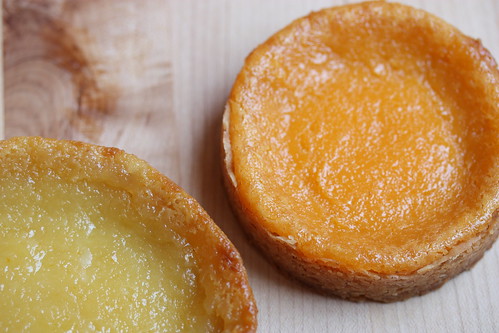
Thank you Babette of Babette Feasts selecting this wonderful recipe! For more beautiful tarts, make sure to explore the TWD blogroll.

Sunday, May 10, 2009

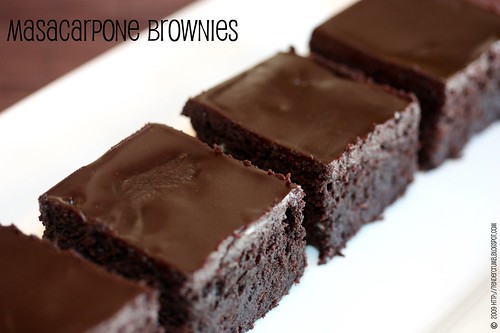
Chocolate Mascarpone Brownies

When I started my brownie quest earlier this year, Teanna recommended that I check out this recipe for Chocolate Mascarpone Brownies.

With a half a tub of mascapone cheese leftover from a recent effort to make Tiramisu Cake, I had the the perfect opportunity to take this brownie recipe for a test drive.
The sweetness takes a back seat to the intense chocolate flavor, which comes from the chocolate (Callebaut bittersweet in my case) and cocoa powder.

The brownie is wonderfully moist and cakey at room temperature (which is definitely my kind of texture), but it turns wonderfully fudgy if you let it chill in the refrigerator.

A tall, cold glass of milk would be a perfect accompaniament for one of these squares!
Thank you Teanna for introducing me to this utterly decadent and delicious brownie recipe!

Wednesday, May 6, 2009

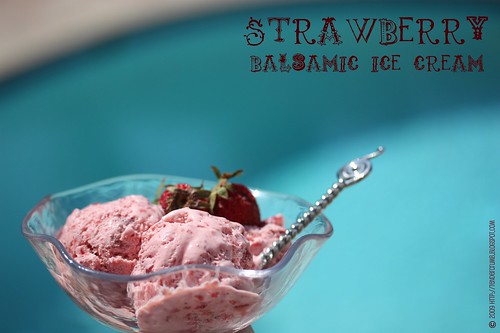
Strawberry Balsamic Ice Cream

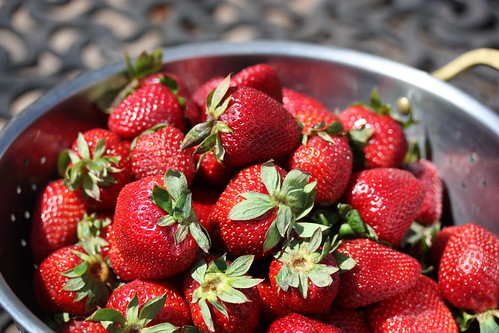
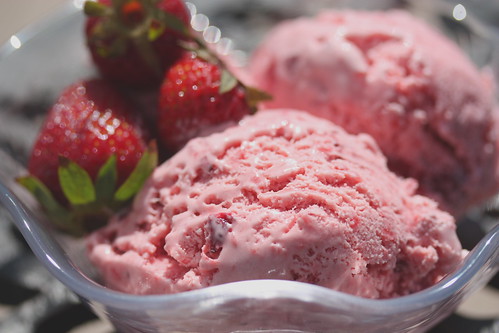
I love strawberry season! In Southern California, you know that summer is just around the corner when you see gorgeous strawberries overflowing at the local farmers market...and the unbelievable fact is that you can get a half flat (6 baskets) of super sweet, juicy berries for 10 bucks. With the berries at their height of their season, there is no better way but to eat them fresh --- no embellishments needed. If the mood strikes to do something with them (besides stuffing my face), I'll make this ice cream. The strawberry is the star of this recipe, but with a little something to take this ice cream over the top:
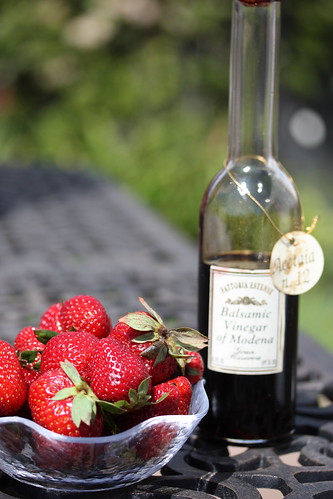
Yes, balasamic vinegar. Using just a wee bit of high quality, aged balasamic vinegar really brightens the flavor and enhances the sweetness of the berries. Admittedly, it can be a small investment for a good balsamic vinegar (I think I paid $30 for the bottle pictured), but a little goes a long way, and it makes a huge difference in recipes like this. I'll even pour a little of this balsamic over a scoop of vanilla ice cream - believe it or not, it tastes heavenly!
Strawberry Balsamic Ice Cream
makes approx 2 qts

1 1/4 lb fresh strawberries- rinsed, hulled, and sliced
1/2 c. sugar (you can increase this to 3/4 C, depending on the level of sweetness you prefer)
2 tbsp balsamic vinegar
2 tbsp vodka (keeps the ice cream from turning rock hard in the freezer)
1/2 c. creme fraiche (or sour cream)
1 1/2 c. heavy cream

1. Combine the strawberries with the sugar, balsamic vinegar and vodka in a large bowl. Cover and let stand at room temp for an hour or so.

2. Pour strawberry mixture into a food processor. Add the creme fraiche and heavy cream and process until just combined. I like to see chunks of fruit in my ice cream. If you prefer a smoother version, process further until smooth.

3. Chill the mixture, then freeze in an ice cream maker.

Tuesday, May 5, 2009

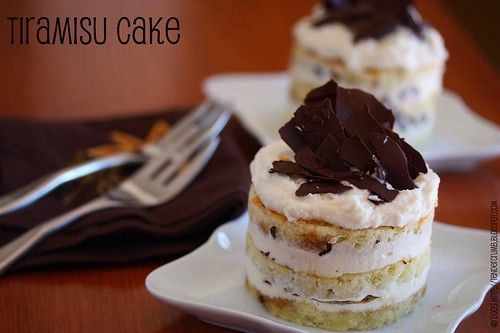
Tiramisu Cake (TWD)

I was so happy to see that Megan of My Baking Adventures selected Tiramisu Cake for this week's Tuesdays With Dorie recipe. For a while, tiramisu was considered THE dessert, and it was included on almost every restaurant menu. Trendy or not, tiramisu has always been one of my favorite desserts.

In BFMHTY, Dorie Greenspan developed a twist to the traditional recipe, transforming the trifle-like dessert into a layer cake. Instead of making a whole cake, I reduced the recipe in half, and made individual layer cakes.

My recipe notes and adjustments are as follows (for the full recipe, please visit Megan's blog):

- I used one 9" round pan to bake the cake, and used 3 inch ring molds to cut out individual cakes. I also cut the cake rounds crosswise to get thinner layers. This yielded enough to make 4 triple layer mini cakes.

- Instead of figuring out how to halve 3 eggs and 1 yolk, I went ahead and used 2 whole eggs. The cake turned out just fine.

- I brushed a mixture of 1 tbsp espresso syrup and 1/4 C sweet marsala wine on the cake layers.
- Chopped bittersweet chocolate was nestled between the layers

- For me, the mascarpone filling is the best part of any tiramisu, so I made a full batch. I used about 2/3 of the batch for this recipe. The remaining filling will not go to waste; I'll use it as a delicious topping for some gorgeous strawberries that I picked up over the weekend.

- Definitely serve the dessert at room temperature. Chilling the cake will change the texture of the mascapone filling.

I had some leftover cake and mascarpone filling, and just for fun I created one traditional style tiramisu in a small trifle dish:

Regardless of the presentation, Dorie Greenspan's riff on this classic dessert is fantastic! The layer cake version was easy to make and assemble, and even more a treat to eat.

The yellow cake was nice and dense like a pound cake, and the layers kept its shape after a healthy brushing (i.e. soaking) with the espresso/marsala syrup.

The mascarpone filling / frosting was different from the zabaglione filling that I'm familiar with. I would give the the traditional filling a slight edge in terms of texture and flavor, but I wholeheartly welcomed this no cook version.Thanks Megan for this great 90's flashback! Make sure check out the TWD blogroll to see the handiwork of some amazing bakers.

Blog Widget by LinkWithin